
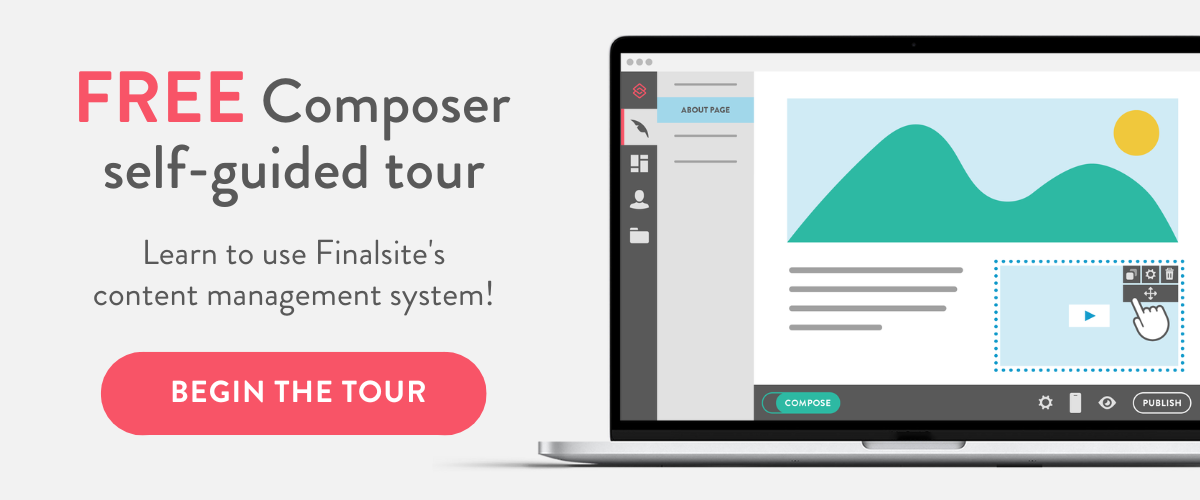
Since Composer, our content management system (CMS) is the backbone of Finalsite’s marketing and communications platform, and is used by thousands of schools around the world we thought we’d take a moment to dig into it a bit. It’s the foundation on which all of our software and modules are built. It’s the way you interact with your Finalsite website on a daily basis. And our CMS is likely the reason you turned to Finalsite in the first place.
Whether you’re a Finalsite veteran or brand new to Composer, you’ll quickly come to love and rely on Composer’s comprehensive suite of powerful and flexible site management tools to quickly and easily manage your website. While we’d love to go into great detail about every single way Composer can help your school, let’s get back to basics with 10 of the most common ways Composer saves your school time and improves your marketing and communications.
1. Create Once, Publish Everywhere
Create Once, Publish Everywhere (C.O.P.E.) refers to Composer’s ability to create content once on your website and then reuse that same content anywhere else. Think of it like an enhanced version of your computer’s copy-and-paste ability. You likely use Command + C and V (or Control + C and V) every day to quickly reuse content. With Composer, you can do the same to build your website and pages in a fraction of the time.
C.O.P.E. extends to every one of Finalsite’s communication modules. When you update or add a piece of content to a calendar, form, news post, teacher page, blog — you name it! — that update is made anywhere that post appears on your website.
C.O.P.E. also extends to the Composer interface itself. There’s no need to manually recreate entire sections of a page when you can do the same task with a single click. Simply copy and paste entire elements to as many pages as you want.
Shared elements take C.O.P.E. one step further by allowing you to save an element you’ve created to reuse on another page or banner in the future. Any site admin can reuse that shared element on any other page they have permission to edit.

Saving custom elements that are commonly reused allows schools to quickly grow their Shared element library with ready-to-use presets that can be added to any page, significantly lowering the amount of time needed to build and edit your school’s website by allowing multiple site admins to use the same tools.
Composer has one final C.O.P.E. trick up its sleeve. Linked Pages make it easy to duplicate and reuse entire pages across multiple navigation menus.
Rather than spending the time to recreate a page from scratch, or even copy and paste individual elements, simply create a new page as normal, but select the Linked Page tab in the New Page pop-up menu. Linked Pages are connected (or linked) to another page that you select, including external pages not found on your website.

With multiple ways to easily reuse content across your school’s website, Composer significantly reduces the amount of time spent building and editing websites, without sacrificing on quality and performance.
2. Editing made simple through a WYSIWYG interface
One of the common misconceptions about building, editing, and maintaining a website, especially from those without prior website or coding experience, is that it’s a complicated, tiring, and downright infuriating process involving a lot of trial and error.
While that may have been true in the past, that’s not the present and future we imagined when we built Composer. Instead, we made the editing experience simple and intuitive thanks to Composer’s “What You See Is What You Get” (WYSIWYG) interface. Put simply, edits you make in Composer are displayed as how they will appear live on your website.
Our WYSIWYG editor most notably includes drag-and-drop elements that makes adding new content to your page as simple as clicking Add Element on a page in Composer mode and selecting the element you want to add to the page.
Once a new element has been added, a simple-to-use interface makes it easy to add content. Editing text in a content element is nearly identical to editing text in a Word or Google document, with all of the same features and tools you’d expect, such as the ever-handy spell check, ability to add links, and format text into bulleted or numbered lists.

3. Built-in Accessibility Checker makes it easy to remain ADA-compliant
One of the tools that you’ll quickly come to rely on within Composer is the built-in Accessibility Checker. Found both in Composer and our Posts module, the Accessibility Checker makes it easy to quickly scan for a wide variety of accessibility issues. These issues include, but are certainly not limited to: missing alt text, improper use of headings, and incorrect or vague links.
The World Wide Web Consortium (W3C) Web Accessibility Initiative (WAI) offers Web Content Accessibility Guidelines (WCAG) that are an incredible resource to have bookmarked.
Considering that around 15 percent of the world’s population has some form of disability that can make using your website a challenge, the Accessibility Checker is an invaluable free addition to Composer and Posts that makes keeping your content and website ADA-complaint that much easier.
The Accessibility Checker is found and accessed within Composer’s and Posts’ editing bar at the top of each content block. Click the icon that looks like a person within a black circle to open the Accessibility Checker. Within a few short seconds, the tool will scan the entire content block (or post) for any accessibility errors or suggestions.

Once the scan is complete, a pop-up window will open by the first error or suggestion, if any are present. A brief explanation is provided, as well as a quick and easy way to correct these errors or oversights through the Quick Fix button.

For example, you can add alt text to an image that was uploaded without alt text by typing in new alt text and hitting Quick Fix. The Accessibility Checker will make the change and continue down the list until there are no further errors or suggestions to address.
Finalsite has committed to a holistic approach to website accessibility. On that front, we are continually adding more accessibility tools and options to make keeping your website ADA-compliant easier than ever.
4. Easily transition between desktop, tablet, and mobile views with Device Preview
Every school website created in Composer and designed by our award-winning team of designers are fully responsive, meaning the website automatically adjusts to best fit the screen a visitor uses to access your website.
Our experienced designers take into account the unique time and space requirements for mobile website design. Mobile users are often on slower wireless connections, so your website needs to load faster by hiding extra resource-heavy images and videos. Space is just as important since mobile screens offer less real estate to display all of your school’s important information and beautiful images and videos.
It’s a lot to consider when building a website, and these considerations are just as important once you start adding new pages or content to your live website. Fortunately, we’ve added the Device Preview tool to see how your website automatically adjusts to fit every screen size.
Access the Device Preview tool by clicking on the smartphone icon on the bottom black toolbar found on any Composer page on your website. The bar will rise up to display an entire row of website views available, ranging from the smallest of mobile screens on the left with a 320 x 480 resolution to the enormous HDTV 1080p view on the right for the largest of screens.

Click on each of these icons to see how your website automatically adjusts to fit the screen size of each available option. You’ll immediately notice that your images, videos, and elements are automatically adjusted to make the best use of the continually diminishing space.
Keep the Device Preview tool in mind when designing and building your webpages. It’s always best to regularly check how your pages look on smaller screens while you’re in the process of adding content than it is to redo an entire page because it looks terrible on a mobile screen.
5. Create and use banners to quickly add headers and footers to every page
Banners are an easy way to frame the content of any page with additional locations to add elements. Left and right banners are excellent ways to add supplementary information or page-specific navigation menus, while top and bottom banners (headers and footers, respectively) are perfect for adding site-wide navigation menus and shortcuts to the most-used areas of our website.
Banners are added through the Page Layout and Appearance icon found on the bottom bar of any page when in Composer mode. Pick from a list of all available configurations by selecting one of the icons that matches the configuration you’d like to use. Then, use the dropdown menus to define the banners that will be used on the page you’re currently editing.

New banners are created in the Banner section of Composer, found directly under the Pages section in the left-navigation Composer menu. You can also create a banner that will be immediately applied to a page by clicking on the green + button next to each dropdown menu in the Page Layout and Appearance menu.
Once you’ve added a banner to a page, you can add elements just as you would add elements to the rest of the page. Banners also change in appearance based on the Theme applied to the page. You can preview a banner from the Banners section after it has been applied to a page by clicking on the Preview Banner on a Page icon.
6. Bulk publish and update pages with a single click
It can be a minor annoyance to have to go into each page and manually publish multiple pages one at a time. Thankfully, we included the ability to publish every page under a single branch with a single click of the mouse.
You can see what pages need to be published by looking at the colored bar to the left of each page name. If the bar is orange, the page has edits that haven’t been published. If that bar extends down to span several pages, you’ll want to use the Bulk Publish tool.

To Bulk Publish pages, hover over the highest-level page in a branch that contains pages with unpublished edits. Click on that page’s three-dot action menu and select the Bulk Publish option to open a new pop-up menu. Here is where you will see and pick pages with unpublished changes that you want to publish. Simply check the box next to the page names (or click Select All) and click the Published Selected button.
Bulk Update follows the same idea and allows you to update the page settings for multiple pages at the same time. Pages with changes made through Bulk Update will still need to be published in order for the changes to take effect. That’s another great opportunity to use the Bulk Publish tool to save even more time.

7. Quickly upload and embed images and videos
There are multiple ways to add visual content to your website: in a content element, through an Image or Resource element, or through an Embed element.
In a Content element, click on the Image icon in the editing interface to open an Image Properties menu where you can choose to add an image through a URL, File Manager, or Resources. There are also options to add alternative text (alt text), align the image on the page, add a class to the image (such as padding to keep text from touching the image), and the ability to keep the image responsive or select specific width and height measurements.

Once you’re done adding the image and customizing its attributes, click OK to add the image to the Content element. It’s that easy!
You can also add single images to your page through an Image or Resource element. Add your element of choice (Resources in the video example below), and navigate through the options to upload your image. Image options include custom titles, change the file name, add a short description, add alt text, and add tags for easier organization. Whatever options you select on the back-end will appear on the front-end when you add the image through an Image or Resources element, styled with your website’s look and feel.
You can also add multiple images at once to any page through a List, Grid, or Slideshow-style configuration based on Galleries created within Resources.
Galleries organize and group images or videos in Resources. Once you’ve added images or videos to a gallery, add the Resource element to a page and select the List, Grid, or Slideshow option to add that gallery in the chosen format. You can then change the way the List, Grid, or Slideshow is displayed on your page through additional options.
For videos, select the Video or Resource element. The rest of the process is the same as adding an image to a page.
There’s also an Embed element option that can be used to copy an embed code from a video website and paste on your school’s website. The Embed element supports every video website that can generate embed codes. Videos added to your website via an Embed element will automatically adjust to fit the available space.
YouTube and Vimeo elements also exist to make displaying videos from whose websites even easier. Simply copy and paste the video’s URL into the available URL text box.

The Embed element is highly adaptable and can be used for more than just video. Feel free to embed music players, images, and many other forms of rich material hosted on other sites. Whatever you choose to embed, Composer eliminates the unnecessary guesswork and accurately reflects edits so you can feel confident that your page looks exactly how you imagined it before you hit Publish to make that page live.
8. Easily integrate social media feeds
Composer makes it easy to integrate your school’s social media platforms through our social media feeds module and element. Showcase all of your school’s social media content on your website in real time with the Feeds element that automatically populates with new content as frequently as every five minutes or up to four hours.
Adding social media to your website is as easy as adding a Feeds element from the Social tab of the Elements menu. Then, click the Feeds element to select which social media platform to automatically pull content from. Feeds supports all of the most popular platforms like Facebook, Twitter, and Instagram. You can also adjust how many posts appear at any one time in the Feed, as well as how wide the Feeds element appears on the website.

For an excellent use of a well-constructed social media feed, check out Choate Rosemary Hall’s Live@Choate social media page. Choate created different hashtag campaigns that pulls in content from across their various social media platforms at the same time.

9. Add permissions and adjust SEO settings for individual pages
Once you’ve created and built your page in Composer, you’ll want to head to the Page Settings menu accessed by clicking the Gear icon in the bottom black toolbar. This is where you'll find all the other extra essential settings for each individual page.
The first option in the General tab provides the ability to add a custom URL to each page, incredibly useful for keeping your page’s URLs short and memorable. By default, page URLs are automatically derived from the page’s name.
You can also hide each page from navigation elements, internal site search, external search engines, and secure pages over secure (SSL) connections. The first three of these options are useful for building a page over several days without worrying about people finding a half-finished page live on your website.

Composer allows site admins to assign permission levels on a global, branch, or page level.
Global permissions are set per admin group, such as Editors, Webmasters, Admissions, or Advancement. Permission levels are assigned to each group based on varying levels of editing rights, including: Not Allowed; View; View and Edit; View, Edit & Publish; and Admin.

Our Composer permissions knowledge base article provides a complete breakdown of each permission level.
Page-specific levels of permissions overwrite global permissions. Page-specific permission are found in the Permissions tab of the Page Settings menu. You can adjust the level of permissions for editing each page based on the available group of users.

Branch permissions are used to adjust and set permissions for every page in the same branch.

The SEO tab adjusts how each page appears to search engines, and what the page looks in search results.

SEO Title is the title displayed by search engines on the search results pages. Keep these titles short as search engines generally display only up to 60 characters.
SEO Description is the short description found under the title in search results. The description is also what appears on social media sites when users link to this page.
SEO Keywords can be assigned to associate specific search terms with your page. Assign relevant words that are commonly searched to help that page appear more frequently on the first page of search results.
10. Expand the capabilities of your website with more than 20 communication modules for Composer
Composer was designed to take full advantage of our wide range of communication modules and integrations that have been rigorously tested, developed, and improved over the years to provide schools and districts alike with the most useful and powerful tools in the industry for school marketing and communications.
If your school has a website goal, Finalsite has a solution to help you meet that goal.
Key Takeaway
Composer is an industry-leading content management system with an unmatched level of customization and an intuitive editing experience that makes it easy for anyone and everyone in your community to create beautiful, professional-looking pages without sacrificing on design quality, functionality, or performance.

ABOUT THE AUTHOR
As Finalsite’s Product Marketing Specialist, Andrew writes blogs and creates videos to share information about all the latest and greatest Finalsite products. Andrew has more than 10 years of video production experience and a journalism education from the University of South Carolina. He is excited about bringing his experience and expertise to Finalsite.


